Learn how to wax a snowboard with ease! Our step-by-step guide covers everything you need to know, from preparing your snowboard to applying the wax and achieving a polished finish. Regular waxing can improve your snowboard’s performance and lifespan, so don’t miss out on this essential maintenance task. Follow our 10 easy steps and get ready for a smooth and speedy ride down the slopes!
In this post, we will learn how to wax a snowboard in 7 easy steps. We will discuss these points in detail so that by the end of the post, you will become an expert on the subject of “how to wax a snowboard”. and we will discuss other important stuff like whether should you get your snowboard waxed at a store or you should do it yourself, is there a difference in the performance of a waxed and a nonwaxed snowboard? so, without wasting any more time, let’s get to it.
Table of Contents
Why you should wax your snowboard?
Waxing your snowboard is an important part of its maintenance, and it offers several benefits. Here are some reasons why you should wax your snowboard:
Improved Performance: A properly waxed snowboard will glide more smoothly and quickly on the snow. The wax helps to reduce friction between the board and the snow, allowing for faster and more controlled turns.
Protection: Waxing your snowboard helps to protect the base of the board from damage caused by rocks, debris, and other hazards on the mountain. The wax also helps to prevent the base from drying out and becoming brittle.
Increased Lifespan: Regular waxing can help to extend the lifespan of your snowboard. By reducing friction and protecting the base, waxing can prevent wear and tear on the board, allowing it to last longer.
Better Overall Experience: A well-waxed snowboard will offer a more enjoyable ride, with smoother turns and better control. Waxing your board regularly can help you to get the most out of your snowboarding experience.
So, waxing your snowboard is a simple and effective way to improve performance, protect your investment, and ensure a better overall snowboarding experience. It is recommended to wax your board at least once per season, or more frequently if you are a frequent snowboarder.
Is there a difference in the performance of a waxed and a nonwaxed snowboard?
Yes, there is a noticeable difference in the performance of a waxed snowboard compared to a nonwaxed snowboard. Let’s check out some of the ways that waxing can affect the performance of a snowboard:
Speed: A properly waxed snowboard will glide more easily and quickly over the snow. The wax helps to reduce friction between the board and the snow, allowing for faster speeds and more control.
Turning: A well-waxed snowboard will also be easier to turn, as the wax helps to reduce drag on the board. This allows for smoother and more controlled turns and can make a big difference in overall ride quality.
Durability: Waxing your snowboard regularly can help to protect the base of the board from damage caused by rocks, debris, and other hazards on the mountain. This can help to extend the lifespan of the board and ensure better performance over time.
Overall, waxing your snowboard is a simple and effective way to improve performance and ensure a better overall snowboarding experience. While a non-waxed snowboard may still be rideable, it will not perform as well as a properly waxed board and may be more difficult to control and maneuver on the snow.
What are the materials and tools required to wax a snowboard?
To learn how to wax a snowboard, you will need a few materials and tools. Here is a list of the things required to wax a snowboard:
Wax: There are several types of snowboard wax available, including all-temperature wax and temperature-specific wax. Choose a wax that is appropriate for the temperature conditions you will be riding in.
Snowboard Iron: A snowboard-specific iron is necessary to heat the wax and apply it to the snowboard. Check out some excellent snowboard specific Irons
Scraper: A plastic scraper is used to remove excess wax from the base of the snowboard after it has been applied.
Base Cleaner: Use a base cleaner to remove dirt and debris from the base of the snowboard before waxing. This will help ensure that the wax adheres properly to the base.
Nylon Brush: A nylon brush is used to remove any remaining wax particles from the base of the snowboard after scraping.
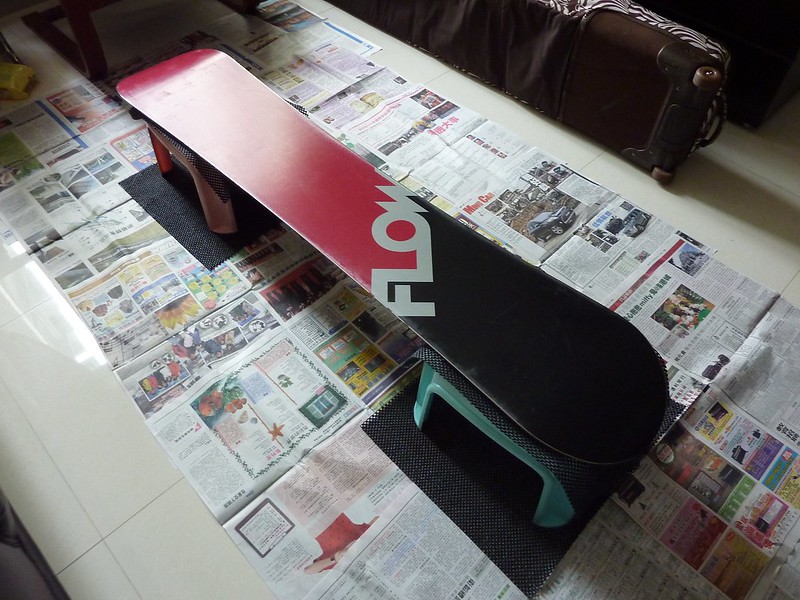
Workbench or Vise: A workbench or vise will hold the snowboard in place while you wax it. This will make the process much easier and more efficient.
Protective Gloves: It is recommended to wear gloves to protect your hands from the hot wax and iron.
Overall, these materials and tools are essential to waxing your snowboard effectively and efficiently. While some of these items can be substituted or improvised, having the proper tools and materials will make the process much smoother and ensure better results.
How often should you wax a snowboard?
The frequency with which you should wax your snowboard depends on how often you use it and the conditions in which you ride. Generally, it is recommended to wax your snowboard at least once per season, but if you are an avid snowboarder or ride on particularly abrasive snow conditions, you may want to wax your board more frequently.
Some signs that your snowboard needs waxing include a dry or discolored base, sluggish turning or reduced speed, and difficulty maintaining control on the snow.
It’s also a good idea to wax your snowboard before storing it for the off-season to protect the base and ensure that it’s ready to go when you hit the slopes again.
The more you ride your snowboard, the more often it will need to be waxed to maintain optimal performance and protect the base. It’s a good idea to regularly inspect your snowboard’s base and take note of any changes in performance to determine when it’s time to wax it.
And therefore, it is crucial for you to learn how to wax a snowboard so that whenever you feel that there is a need for waxing your snowboard, you can get right to it without wasting any time.
How much does it cost to wax a snowboard?
The cost to wax a snowboard can vary depending on a few factors, such as where you live and whether you do it yourself or take it to a shop. If you choose to learn how to wax a snowboard because you want to do it yourself then you’ll need to purchase the necessary equipment, such as a waxing iron, wax, scraper, and brush. These items can range in price from around $50 to $150 or more, depending on the quality and brand.
If you decide to take your snowboard to a shop to have it waxed, the cost can vary depending on the shop and your location. Generally, you can expect to pay anywhere from $15 to $50 for a basic wax job, with more specialized services and treatments costing more.
Overall, the cost to wax a snowboard can vary, but if you learn how to wax a snowboard, doing it yourself can save you money in the long run if you plan to wax your snowboard frequently throughout the season.
What are the types of wax available to wax a snowboard?
There are several types of snowboard wax available, each with its own specific purpose and characteristics. Here are the most common types of wax:
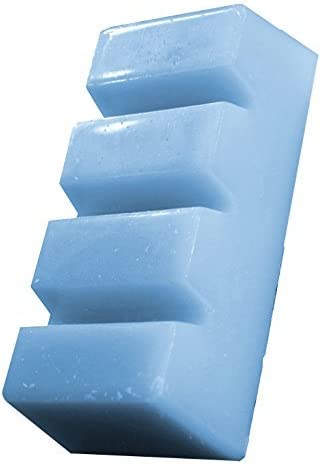
All-Temperature Wax: This type of wax is suitable for a wide range of snow conditions, making it a good choice for general use. It can be used in both cold and warm temperatures and is often the most convenient and cost-effective option.
Recommended All-Temperature wax: Demon Hyper Wax
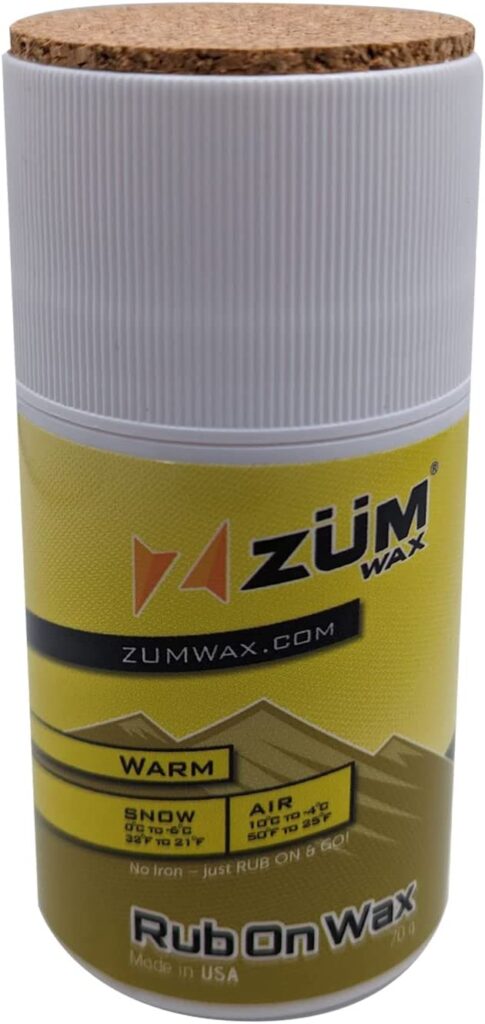
Warm-Temperature Wax: This type of wax is specifically designed for use in warm or slushy snow conditions. It is softer and has a lower melting point than all-temperature wax, which allows it to penetrate the snow more easily and provide better traction.
Recommended Warm-Temperature Wax: ZUMWax RUB ON Wax Snowboard
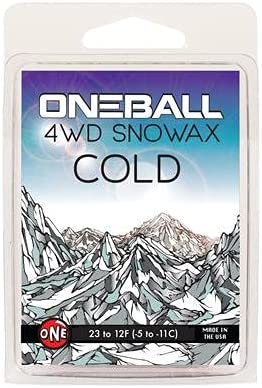
Cold-Temperature Wax: This type of wax is designed for use in very cold snow conditions. It is harder and has a higher melting point than all-temperature wax, which helps it to provide better durability and resistance to abrasion.
Recommended Cold-Temperature Wax: OneBall 4WD Snowax Snowboard Wax
Fluorocarbon Wax: This type of wax contains fluorocarbon additives, which help to repel moisture and provide better glide on wet snow. It is often used by professional snowboarders or those who need a top performance in very specific conditions.
How to wax a snowboard?
Below are 7 easy steps you should follow to wax a snowboard. We will discuss all the steps in detail and we will also provide you with useful tips. So keep on reading.
- Clean the Base
- Remove the cleaner
- Heat up the Wax
- Spread the Wax Evenly
- Avoid clumps and bumps
- Let the wax cool
- Clean the remaining particles with a brush
How to clean the base of the snowboard?
Cleaning the base of your snowboard is an important part of the waxing process, as it helps to ensure that the wax adheres properly to the base and improves the overall performance of your snowboard. Also, it is the first step in learning how to wax a snowboard. Here are the steps to clean the base of your snowboard:
Start by wiping the base of the snowboard with a soft, damp cloth to remove any loose dirt or debris.
Apply a base cleaner to the entire base of the snowboard. Follow the instructions on the cleaner carefully, and make sure to use enough to cover the entire base.
Use a nylon brush to scrub the base cleaner into the base of the snowboard, working from tip to tail. Use firm, even strokes, and make sure to cover the entire base.
Rinse the base of the snowboard thoroughly with cold water to remove any remaining base cleaner.
Dry the base of the snowboard completely with a clean, dry cloth, or let it air dry. It is of utmost importance that your snowboard base needs to be completely dry before waxing.
Why it is important to have a clean base before waxing?
It’s important to have a clean base before waxing because dirt and debris can interfere with the waxing process and prevent the wax from adhering properly to the base. This can lead to reduced performance on the snow, including sluggish turning, reduced speed, and difficulty maintaining control.
Additionally, a dirty base can cause the wax to absorb unevenly or flake off, resulting in an inconsistent wax job and reducing your snowboard lifespan. By taking the time to clean the base of your snowboard properly before waxing, you’ll help ensure that the wax adheres evenly and that your snowboard performs at its best on the slopes.
How to properly heat up the wax using an iron?
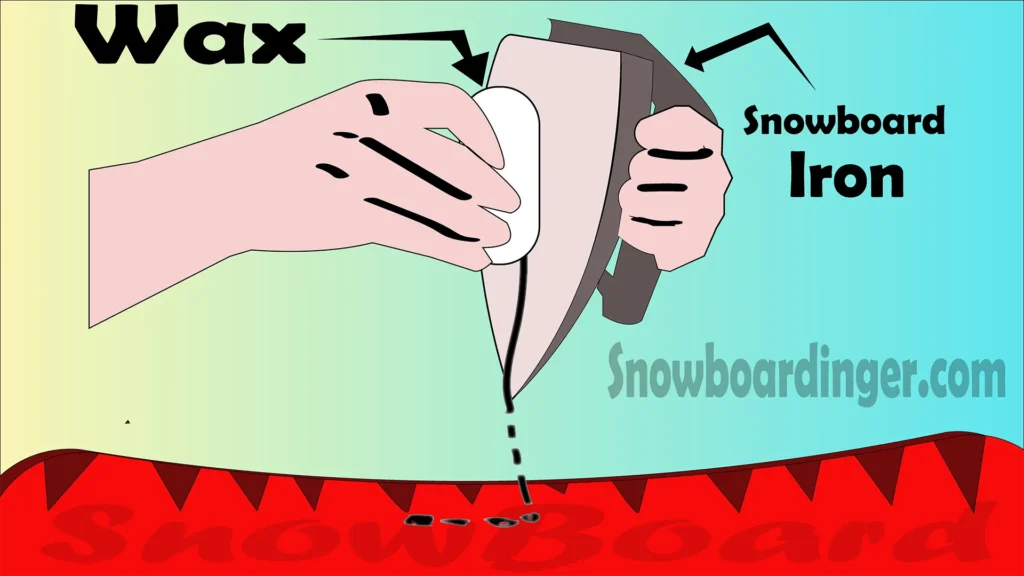
This is a very important step in learning how to wax a snowboard. To properly heat up the wax using an iron, follow these steps:
Set your snowboard on a workbench or vise, with the base facing up.
Select the appropriate wax for the temperature and snow conditions you will be riding in.
Set the iron to the appropriate temperature for the wax you are using. The temperature will vary depending on the type of wax, so be sure to check the manufacturer’s instructions.
Hold the wax against the iron and let it melt onto the base of the snowboard, moving the iron from tip to tail in a smooth, consistent motion. Be careful not to hold the iron in one place for too long, as this can burn the base of the snowboard.
By selecting the appropriate wax for your snowboard and following the proper steps for heating it with an iron, you can help ensure that your snowboard performs at its best and provides optimal speed and control on the slopes.
If you are wondering what size snowboard is right for you, then you can read our post on snowboard size chart it will give you a start and you can go ahead from there.
How to spread the wax evenly over the base of the snowboard
Spreading the wax evenly over the base of your snowboard is essential to ensure optimal performance on the slopes. Here are some steps to follow for applying wax evenly to the base of your snowboard:
Begin by heating the wax using a wax iron, and then drip the wax onto the base of the snowboard in a zigzag pattern, starting from the nose of the board and moving toward the tail.
Once you’ve dripped enough wax on the board, hold the iron at a slight angle and move it over the wax in a smooth, consistent motion from tip to tail. This will help spread the wax evenly over the base of the snowboard.
Continue to move the iron back and forth over the base of the snowboard until the wax has melted and spread evenly.
Don’t hold your iron in one place for a longer time because it can damage your snowboard base. A good rule of thumb is to move your iron 2 to 3 inches per second.
Tips for avoiding clumps and bumps
To learn how to wax a snowboard properly you should learn how to avoid clumps and bumps while spreading wax on your snowboard, here are a few tips:
Use the right amount of wax: Using too much wax can cause clumps and bumps, so be sure to use only the amount of wax recommended for the size of your snowboard.
Keep the iron moving: Holding the iron in one place for too long can cause the wax to clump and burn, so keep the iron moving in a smooth, consistent motion.
Scrap the excess wax: After spreading the wax evenly over the base of your snowboard, Scrap off the excess wax using a plastic scraper, use a plastic scraper to remove any excess wax. This will help ensure that the wax is spread evenly and will reduce the risk of clumps and bumps. but before proceeding for scraping off the excess wax, make sure that the wax is completely cooled down.
Use a nylon brush: After scraping off the excess wax, use a nylon brush to remove any remaining wax particles from the base of the snowboard. This will help ensure that the wax is spread evenly and will help prevent clumps and bumps. Continue reading to know more about brushes.
By following these tips, you can ensure that the wax is spread evenly over the base of your snowboard, which will improve the performance of your board and make your time on the slopes more enjoyable.
Can I scrape the excess wax off before the wax is cool completely?
It’s recommended to wait until the wax has completely cooled before scraping off any excess wax. This is because if you try to scrape off the excess wax while it’s still warm, it can cause the wax to smudge and clump together, making it more difficult to remove.
What is recommended cooling time?
The recommended cooling time for wax can vary depending on the type of wax you use and the temperature of the room you’re working in. As a general rule, it’s best to wait at least 30 minutes for the wax to cool before scraping off any excess. However, if you’re working in a cold room, the wax may take longer to cool, and if you’re working in a warm room, the wax may cool more quickly.
How to ensure the wax is cooled completely?
When you learn how to wax a snowboard you have to learn the touch test. A touch test is used to ensure that the wax has cooled completely before scraping off any excess. This involves lightly touching the wax with the back of your hand to see if it’s cool to the touch. If the wax feels warm or soft, it’s not yet ready to be scraped off, and you should wait a little longer before attempting to remove any excess wax. If the wax feels cool and hard, it’s ready to be scraped off, and you can proceed with using a plastic scraper to remove any excess wax from the base of your snowboard.
How to use a brush to remove any remaining particles?
After scraping off the excess wax, it’s important to use a brush to remove any remaining particles and achieve a polished finish on the base of your snowboard. Here, our goal is to leave only the thinnest layer of wax on the board.
Here’s how to use a brush to remove the remaining wax particles:
Choose a soft, nylon brush: A soft, nylon brush is the best option for removing any remaining wax particles from the base of your snowboard. Avoid using a stiff brush, as this can scratch the base of your board.
Brush in the direction of the base: When using the brush, make sure to brush in the direction of the base, from the tip to the tail of the snowboard. This will help to remove any remaining wax particles and ensure that the base is smooth and polished.
Use a light touch: When brushing the base of your snowboard, use a light touch. Applying too much pressure can cause the bristles to flatten and may damage the base of your board.
Brush several times: To achieve a polished finish, you’ll need to brush the base of your snowboard several times. Start by using a nylon brush to remove any remaining wax particles, and then switch to a horsehair brush to polish the base and bring out the structure.
The basic brush types are brass, nylon, and horsehair and are used in order from coarse to fine. Brass is used before waxing to open up the structure. Coarse nylon is right after scraping, and fine nylon or horsehair are used last.
The colder than snow the finer the brush you finish with. The coarse nylon brush is fine
for wet spring conditions. A fine nylon brush is common for midwinter, and a horse hair brush is usually best for cold powder.
Start with a coarse nylon brush and go from tip to tail and roughly 6 to 10 inch long strokes. You should see small white flecks come up as you brush which is wax coming off the base. If you don’t, you’re not brushing hard enough.
Finish with a polishing cloth: After brushing the base of your snowboard, you can use a polishing cloth to give it a final polish. This will help to remove any remaining wax particles and give the base a smooth, glossy finish.
Follow this procedure with finer brushes as needed. Don’t be afraid while you are learning how to wax a snowboard because you can’t really overbrush, so there is nothing to worry about, but five minutes is a good target. You want the base to look uniformly shiny or oily, and the texture of the base should be visible.
There you have it. This is how to wax a snowboard. Since you know all about how to wax a snowboard, now let’s have some tips for maintaining a properly waxed snowboard.
Tips for maintaining a properly waxed snowboard
Learning how to wax a snowboard is simply not enough, you have to learn how to maintain a properly waxed snowboard to ensure that it performs at its best on the slopes. Here are some tips for maintaining a properly waxed snowboard:
Store your snowboard properly: When you’re not using your snowboard, it’s important to store it properly. Store your snowboard in a dry, cool place where it won’t be exposed to direct sunlight or extreme temperatures.
Avoid skiing on rocks and other rough terrains: Skiing or snowboarding over rocks and other rough terrains can damage the base of your snowboard and cause it to lose its wax more quickly.
Wax your snowboard regularly: Regularly waxing your snowboard can help to protect the base and ensure that it performs at its best. As a general rule, you should wax your snowboard every 4-6 days of riding, or at least every 10-12 times you ride.
Use a quality wax: Using quality wax can make a big difference in the performance of your snowboard. Choose a wax that’s appropriate for the conditions you’ll be riding in and that’s designed for the type of snowboard you have.
By Following these easy tips, you can maintain a properly waxed snowboard and ensure that it performs at its best on the slopes.
FAQ
here are some frequently asked questions related to how to wax a snowboard, along with their answers:
Q: How often should I wax my snowboard?
A: As a general rule, you should wax your snowboard every 4-6 days of riding, or at least every 10-12 times you ride. However, the frequency of waxing can also depend on factors such as the snow conditions and how often you ride and once you have learned how to wax a snowboard, you might want to do it again and again because you will start enjoying it just like you enjoy snowboarding.
Q: Can I use a regular iron to wax my snowboard?
A: While it’s possible to use a regular iron to wax your snowboard, it’s not recommended. Regular irons are designed for use with fabrics and may not provide the precise temperature control needed for waxing a snowboard. It’s recommended to use a specialized waxing iron that’s designed for snowboards.
Q: Can I scrape off excess wax with a plastic scraper?
A: Yes, you can use a plastic scraper to remove excess wax from your snowboard. However, it’s important to use a scraper that’s specifically designed for snowboards to avoid damaging the base. Here is the link for the scrapper that is loved by the snowboarders, click here.
Q: How do I know when the wax is cool enough to scrape?
A: You can tell when the wax is cool enough to scrape by touching it with your finger. If the wax is still warm or soft, it’s not ready to be scrapped. It’s recommended to wait at least 30 minutes for the wax to cool and harden before scraping.
Q: Can I wax my own snowboard, or do I need to take it to a professional?
A: You can definitely wax your own snowboard at home with the proper tools and equipment but for that, you have to learn how to wax a snowboard first. Waxing your snowboard is a simple and straightforward process that can save you money and help you maintain your equipment.
Q: Can I use the same wax for different temperatures and snow conditions?
A: While it’s possible to use the same wax for different temperatures and snow conditions, it’s not recommended. Different types of wax are formulated for specific temperature ranges and snow conditions, and using the wrong wax can result in poor performance and reduced durability. It’s recommended to use a wax that’s appropriate for the specific conditions you’ll be riding in.

